How to Click a Great Candid Photo?

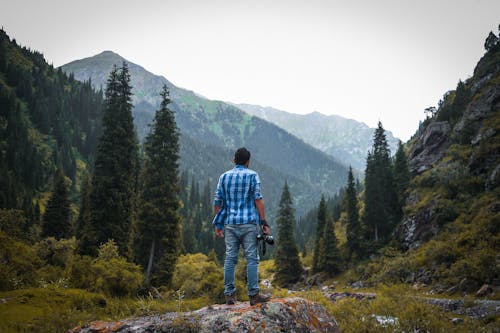
Man in Blue and White Checked Quarter-sleeved Shirt Holding Black Camera Standing on Rock


 How to Click a Great Candid Photo?
By Shalini M  |  Submitted On February 17, 2020
 

It is a bit hard to click a good candid photo. It is not about the photograph alone, but also the emotions captured with it.
To make it clear, candid photo means photos that were genuinely unplanned and unposed. Like the photo of a group gathering, beach trips, family activities, etc.
Here I am assuming that you are shooting using a DSLR. Some of the tips and tricks can be applied to smartphones as well, but it would be best with a DSLR. So let's get started.
 

1. Aperture Modes
Most of the DSLR out there in the market have something called aperture modes. Use them for candid photographs. Manual modes are too slow to capture a candid photo.
 

2. Use a zoom lens instead of a prime lens
The problem with candid photography is that it is fast changing. Within minutes you can go from a group photo to a cake photograph to another group photo. You don't have time to change lenses. So it is better to use a zoom lens instead of a prime lens.
 

3. Make use of ambient light and not flash
In candid photography, the photo scene changes very frequently. Whenever this happens, you should try to measure the quality of the light and then expose the camera accordingly.
 

4. AI Servo AF
Most DSLR has two autofocus modes. One is called Single Point AF-S and is the most widely used model. The other mode is called AI Servo AF, which is best for candid photographs. Remember on Nikon this mode is called Continuous AF-C.
 

5. Click lots of Photos
In photography the most common reason behind bad photos is hesitation. Do not hesitate to click photos. One more photo could mean capturing the best moment of the occasion. Moreover, in the case of candid photography, you don't know when the best moment would occur. You should not wait for the "perfect" shot. Instead, create one.
 

6. Click photos in burst mode
You can try shooting in Burst mode on Nikon or Drive mode on Canon. These modes allow you to click photos after photos in regular interval. This makes sure you do not miss that one "perfect shot". Once you let go the button, the snaps are stopped. This feature is a boon for a photographer working in a high-action shooting. Try it once and thank me later.2


7. Never put down your camera
I simply cannot tell you how important it is to hold the camera. In the interval of finding the camera, picking it up, exposing and composing it and then snapping the shot, the moment can be missed. A golden rule: "Always keep the camera in your hand".
 

8. Try to shoot in RAW Format
The JPG format is not for candid photography! If you are willing to post-process the photos, then you should use RAW format. This format contains much more information than a JPG format. Moreover, it is much easier to edit RAW than JPG.
So, guys, these were 8 useful tips that can make you the king of candid photography. If you are looking for the best Candid photographer in Delhi NCR we are here to help you.
Article Source: https://EzineArticles.com/expert/Shalini_M/2609777
Best Video Settings for the Canon EOS 4000D Rebel T100 DSLR Camera to Shoot Movies


You can visit my Photography Website at https://www.photographynew.com/

Best Video Settings for the Canon EOS 4000D Rebel T100 DSLR Camera to Shoot Movies
By Jeremy Bayston  |  Submitted On October 21, 2020
In order to make any changes to the Canon 4000D for video you need to be in video mode, which is the last icon on the mode dial. This enables you to see through the LCD viewing screen at the back and it's the only way that you can shoot video. You can't shoot video through the viewfinder. 

 The back screen gives you access to the menu tabs which are dedicated to video, and the first thing that you need to do is choose your video system. There are two video systems one is NTSC and the other is PAL. NTSC tends to be the system which is operated in the United States and PAL tends to be the system which is operated in Europe and in other parts of the world. There is not an enormous amount of difference between the two, however it does change the way that the camera operates very slightly when you start to look at frame rates. Under NTSC you get a frame rate option of 60 frames per second, or 30 frames per second, and when you're in PAL you get the option of 50 frames a second, or 25 frames per second. 

 The second thing you need to think about for shooting videos with the Canon 4000D is file size and frame rate. These go together and are quite important because they will decide the quality of videos that you shoot. This camera is pretty good - it will shoot 1080p which is full HD and it will also shoot 720 which is standard HD. Both are perfectly suitable for social media platforms. To make these changes we go again into video menu two and the top option is movie recording size. In that option we get four choices. They depend on whether you've chosen NTSC or PAL. In NTSC, you will have the choice of 30 or 60 Frames per second. In PAL your choice will be 25 or 50 frames per second. I would choose 1920 by 1080 at 25 (or 30) or 1280 by 720 at 50 (or 60) frames per second. 

 The third thing you need to think about is exposure. When you're shooting stills with a Canon EOS 4000D you've got lots of choices. They are all on the Mode Dial. They go from entirely manual, to semi-automatic and then to entirely preset automatic options, and in most cases the camera will be trying to get the best possible exposure for the pictures that you are taking - within the parameters of the preset modes that you have chosen. For movies you have two options. You can either shoot automatic or you can shoot manual. With automatic for video, the camera will try to get the best possible exposure for you. 

 In many cases it works very well. If you go into manual you can change the parameters, just like if you are shooting stills. Go into the video menus. Video exposure is in video menu one the top. This offers two options - auto or manual. Go into manual then you can control the shutter speed, the aperture and ISO. You can see these settings at the bottom of the screen. To change the shutter speed rotate the Main dial on the top of the camera. You can move the aperture up and down by pressing the AV button on the back of the camera and rotating the Main dial. 

 You can actually change both of these settings while you're shooting the video or of course beforehand. However you can't change the ISO when you are shooting video live you have to change the ISO by going to the quick control button and changing it in the options here just as if you are shooting stills
The fourth thing to think about is sound now the Canon 4000D doesn't have an external microphone socket it just has an internal microphone. So recording sound can be a bit limited with this camera but if you go into the menus and into video menu 2, then the second one down is sound recording. You can set that to one of three options - you can either have auto, manual or disable. I would choose between auto or manual. 

 When you are shooting videos you are recording through the back screen and that means that the autofocus system is going to be a bit slower than when you are shooting stills. You have got a couple of good options for autofocus when you are shooting video. In video menu one and go down to AF method and then you will see that you have flexizone, which is the single focus shot. When you press the shutter button the camera focuses and it doesn't change focus until you press the shutter button again. The advantage of that is you can actually focus while you record at the same time and that can be very useful. 

 The second option is called live mode and that's quite useful because it has facial recognition which can make it easier to focus. The third option is quick mode and that tries to be faster by bouncing the mirror inside the camera and using the viewfinder system to focus. But, obviously, you can't operate quick mode while you are shooting video. 

 Jeremy Bayston is a professional photographer and videographer and has 30 years experience as a picture editor for national newspapers in the UK. He has just launched his Superb Canon EOS 4000D course, which offers over 4 hours of video instruction about this Canon DSLR camera. If you have just bought the Canon 4000D or Rebel T100 camera, then this course is a perfect introduction to DSLR photography. Follow this link to find more information, including two full videos from the course.
Or check out this video
Article Source: https://EzineArticles.com/expert/Jeremy_Bayston/1410650